Python Spyder and R’s RStudio – Navigation, Execution, Package Installation, and Getting Help
If you work in an office that uses both Python and R to crunch data, having an awareness and preferably skill with both languages is nice to have. Learning a new language is daunting enough when you feel your extremely proficient in one language, and its nice to have an integrated development environments (IDE) or set of IDEs that make moving between the two programing languages simple(r). When your starting to pickup that new language, the last thing you need is to fight with the IDE to do something simple like, install a package, view a plot or inspect a variable.
Fortunately for the R and Python universes, there is a set of IDEs that look and feel similar. Do they have information in the same spots. No. But its enough to no feel lost moving between environments. For me, the IDEs of note from each camp are R’s Rstudio and Python’s Spyder.
Comfort First
Just after installation, both IDEs come in bright write. That’s not easy for me to look at for short or long coding session. I prefer a dark IDE. So, how do we change the coding and window color scheme in Rstudio and Spyder? It’s pretty easy.
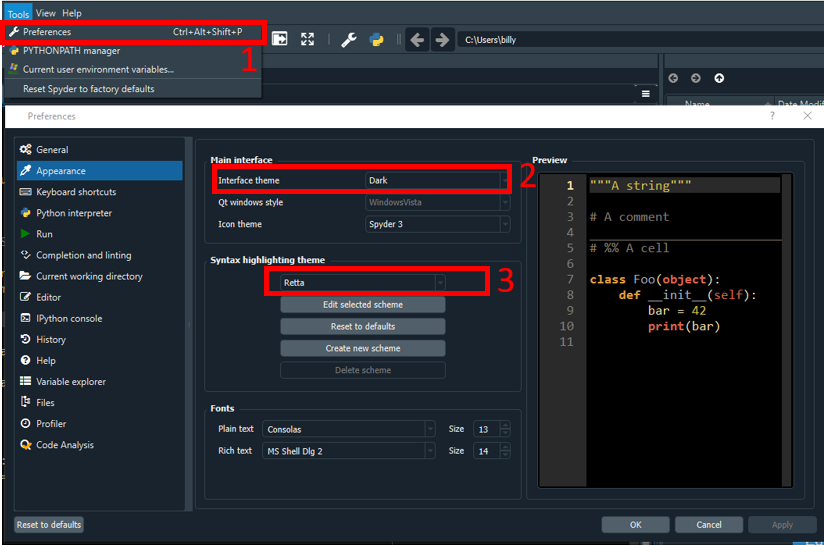
Spyder – Color Scheme Selection
On the menu bar select the following:
Tools -> Preferences -> Select Appearance
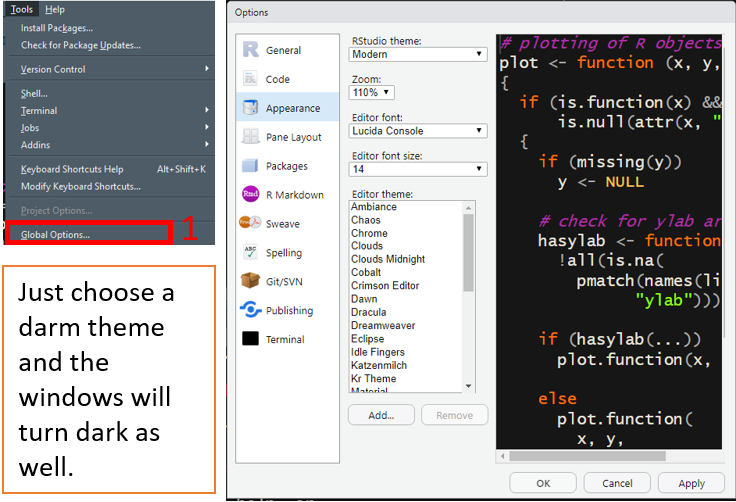
RStudio – Color Scheme Selection
On the menu bar select the following:
Tools -> Global Options -> Select Appearance
The Coding Environment
Now that we have the comfort thing sorted out. Let’s have a quick look at the coding environment. Taking a little time to get to know this in the beginning can save a lot of frustration and feature hunting when you really should be getting value added work done. So, let’s look at what the IDE each have to offer.
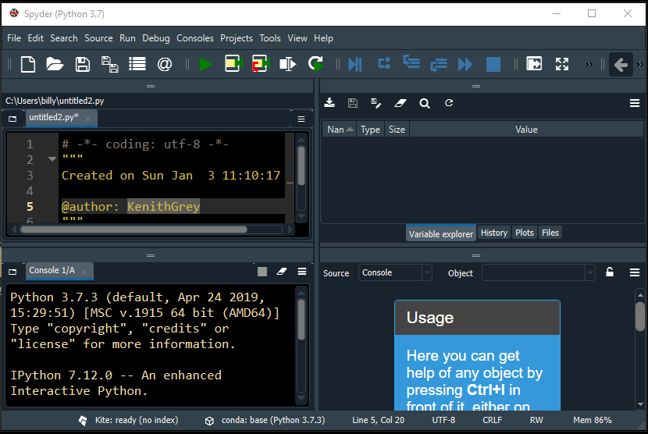
Below are the IDE side by side. At a glance, they look damn similar. Perhaps the most obvious difference being the button bar. Notice that Spyder’s button bar has several buttons for debugging, while RStudio keeps most of the debugging functionality housed in the “Debug” menu item.
Spyder Interface
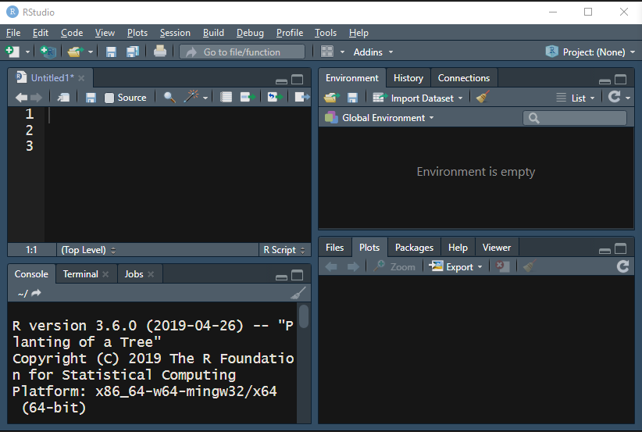
RStudio Interface
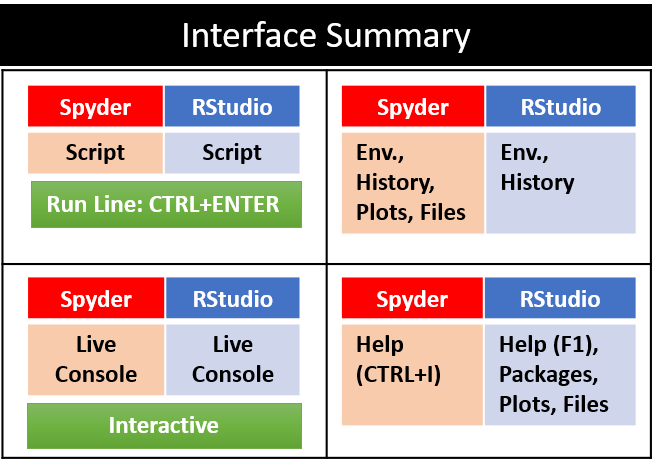
Focusing in on the four panels. We see that the left half of the coding interface is same. The top left is where we enter our code. If we want to execute a line or highlighted chunk of code use CTRL + ENTER. The bottom left is our live session. Things get a little more interesting when we move over to the right side of the coding interface. Spyder keeps environment variables, coding history, plots, and files in the top right hand panel. RStudio, keeps the environment variable and coding history but puts the plots and files in the lower right panel, along with package information (nice feature). We can get help and documentation on functions being used in the lower right hand pannel of both IDEs. Here is a graphical summary
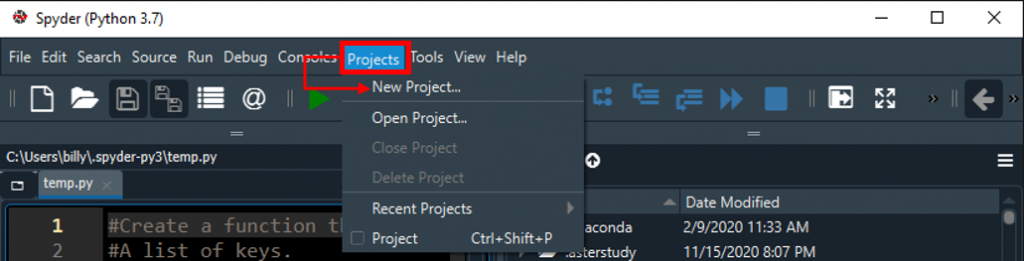
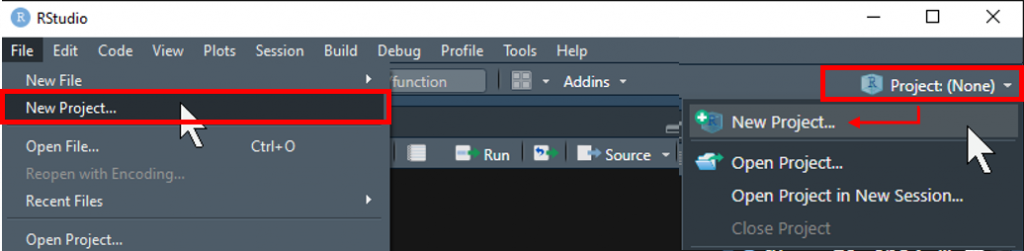
Creating a Project Environment
When coding, I like to work inside a “project” environment. Project environments are essential to my personal sanity for a few reasons. First and foremost, it keeps my work organized and separated into nice little chucks. These chucks have their own coding history, working directory, and show up in a project list which is super convenient for quick access. To create a project follow the images below.
Getting Help & Documentation
Inline Tips
Doesn’t matter if your learning the language for the first time, crossing over from another language, or a master of the language, inline code tool tips are indispensable reminders of how to make a function or object work. In RStudio, tool tips happen as you type. In Spyder, you need to alter a few preferences to get the tool tips to show up while typing or mouseing over.
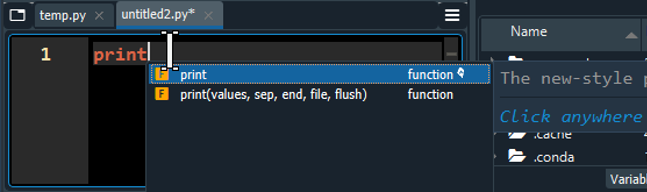
Spyder: Tip as you type
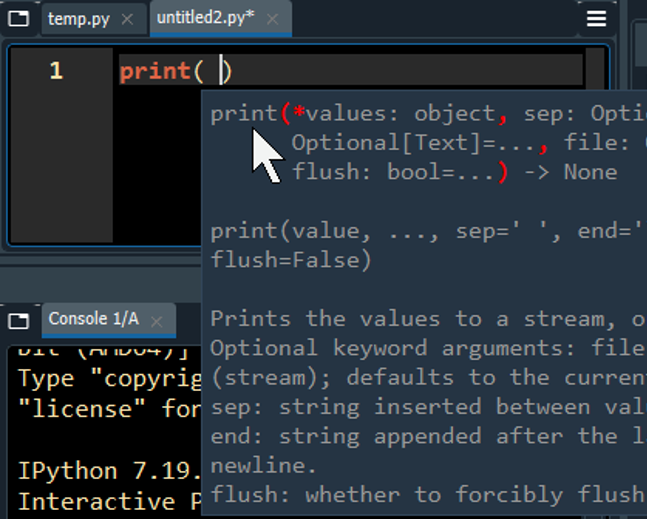
Spyder: Detail In Function Parenthesis
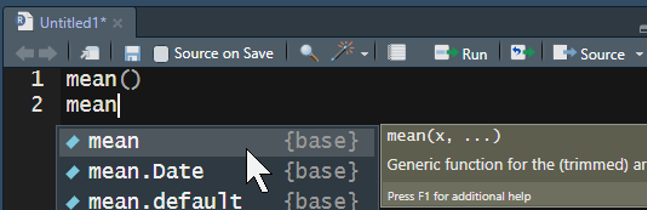
RStudio: Tip as you type.
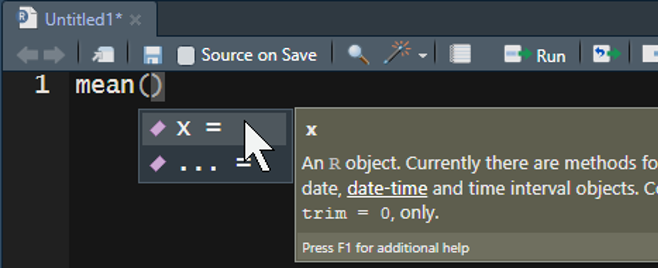
RStudio: Detail In Function Parenthesis
I find that sometimes the Spider tool tip, dissapears a little quick. To get Spyders tool tips to persist a little longer while your typing, try playing around with the help options under
Tools -> Preference -> Select "Help" -> Automatic Connections
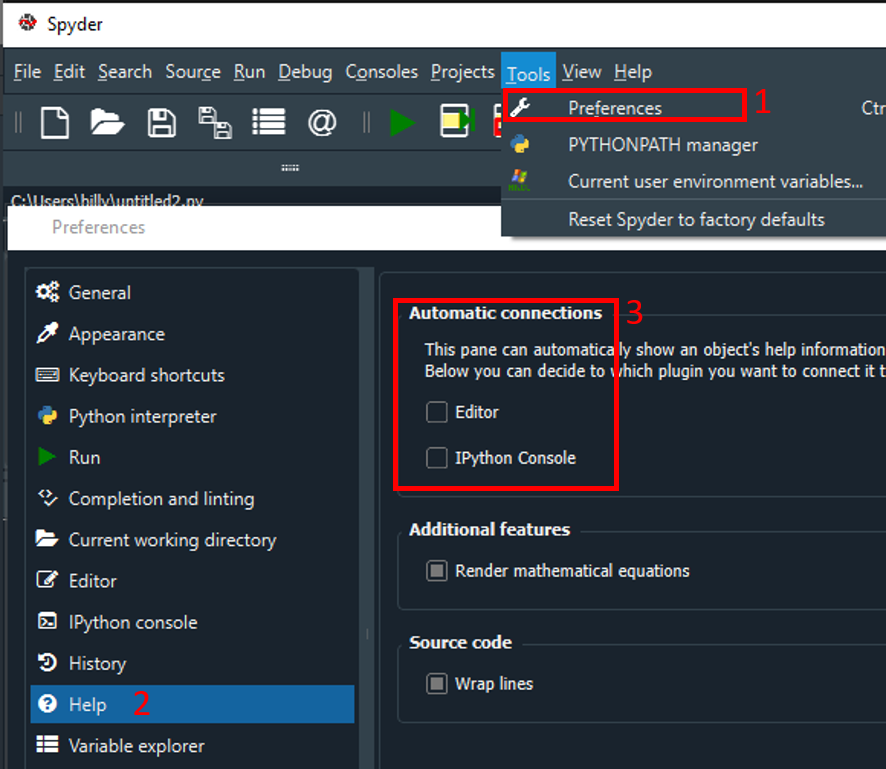
You’ll need to play around with the selections in the settings window to find what works best for you and your work habbits.
Using the help Panel
Some times you need a function’s documentation to see if it has an argument that will magically fix the issue at hand. Other times an inline tool tip isn’t cutting it and you are not ready to check stack exchange. Either way documentation please. In eaxh IDE there are a few ways to get more detailed help on an function, one way is to use a hot key and other is to literally call upon the built in help function. Both are domonstatred in the table below.
[Cheat Sheets]
Cheat sheets for your target programing language rock and their organization and level of detailncan really take the edge of the learning curve. Cheat sheets are also used to consicely summarize the most important information from some of the most pivital paxkages. This can trend can help you focus your learning efforts on the more promenent packages first before getting caughtup in more nuaced packages.
To that end, here are some nice cheatsheets. That you can find in the IDEs.
Installing & Updating Packages
[Code Snipts on how to install packages]